|
Animating the Reaction Start
Overview Modeling Molecules Animating the Reaction Setting the Stage Making Glass Mixing Chemicals Animating the Camera Animating Precipitation Putting It All Together 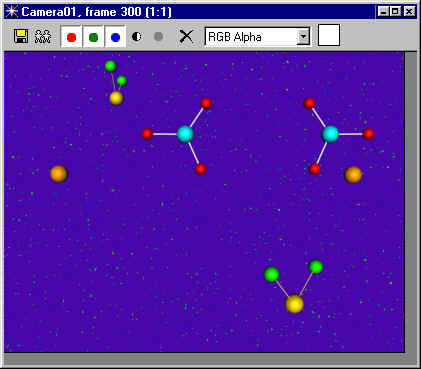
|
|
Animating the Reaction Start
Overview Modeling Molecules Animating the Reaction Setting the Stage Making Glass Mixing Chemicals Animating the Camera Animating Precipitation Putting It All Together
|
|
In this lesson, students animate the reaction of potassium iodide with lead nitrate. This is a double displacement reaction in which the anions and cations of two different molecules switch places, forming two entirely different compounds. The formula for the reaction is: Pb(NO3)2 + 2 KI ---> PbI2 + 2 K(NO3) Animating the Camera Open Molecules.max and resave it as Reaction.max. Type H to open the Select Objects dialog box. You should have the following objects in your scene, or ones with similar names:
For consistency with this tutorial, you may want to rename your objects and groups so that they follow this example. Close the Select Objects dialog box.
Select the camera and dolly it up to the molecules so that just the main players -- Pb, I, K, NO3 -- are visible. The water molecules should be hidden beyond the view frame of the camera:
Turn off the animate button. In the track bar, select the camera's second animation key at frame 175. Right click on the key and select Camera01: Position:
The key settings for key 2 appear. Set the In key position tangent to Ease In. Then click the previous arrow to move to key 1:
The key settings for key 1 appear. Set the Out position tangent to Ease Out. Then close the dialog box:
Play the animation. The camera eases out of its initial position, increases speed until it is half way to the central molecules, and then slows down until it comes to a halt. Save your scene. Animating the Reaction Choose the Select and Link tool from the toolbar. Select the bond in the lower left quadrant and link it to the iodine atom adjacent to it. Then select and link the bond in the lower right corner to its nearby iodine atom:
Move the K, Pb and NO3 molecules to match the positions pictured below:
Turn off the animate button. Then, for every object you just moved:
Play the animation. From frame 200 until frame 300, the molecules change position. Select the two iodine molecules, their bonds, and the lead molecule that make up the group at the bottom of the view. Choose Group > Group and name the new group PbI2:
In the Top viewport, make 2 copies of the group and position them well above the ring of water molecules so that they will be outside the range of the camera at frame 0:
Select and scale down the two groups at the top. Make one group smaller than the other:
Select and move each of the three PbI2 groups and move them down below the ring of water molecules:
Turn
off the Animate button. Select each of the PbI2 groups and move their first key frame to frame 315. Play the animation through the camera view to see how fast the molecules fall. If needed, adjust the speed of the PbI2 groups by changing their start or end positions.
Choose the Rotate tool and change the Reference Coordinate System to Local. Rotate the PbI2 molecules on their local axis a few times:
Turn off the Animate button. As before, select each of the PbI2 groups and move their first key frame to frame 315. Play the animation. The molecules start spinning and falling after the double displacement reaction is complete. Adjust the rotation of the molecules in the track bar by adjusting the right-click settings of their final rotation keys:
When you are done, the three PbI2 molecules fall one after another, spinning through the scene:
Congratulations! You have completed the animation. Save your scene. Rendering the Animation Before we render the animation at full size, we will do a test render. Turn off raytrace global antialiasing in the Material Editor. Then open the Render dialog box and set the image size to 160 x 120. Name the file test.avi and begin rendering a test file from the camera view. The rendering time will be approximately twice what the Rendering dialog box tells you it will be, due to the slower frame rendering times towards the end of the animation.
Set the Output Size to 320 x 240. Set the time output to Active Segment. Click the Files button. Name the file ChemReaction and choose the AVI file type. Click Save. In the Video Compression dialog box, choose Microsoft Video 1 and Compression Quality 100:
Click OK, Save and then close the Render dialog box. Save your scene.
This completes the modeling and animation of the chemical reaction. For those who would like to make a more complete animation of chemicals pouring into a beaker and precipitating out, go to Setting the Stage.
|
© 2000 Michele Matossian