Earthworms
move by stretching out and anchoring tiny bristles in the soil. Then
they pull their tails toward their head ends.
Open Earthworm04.max.
 Click Zoom Extents All to center the earthworm and its food in all four
viewports.

 In the Top viewport,
zoomout and pan to so the objects appear in the upper left part of the
viewport. In the Top viewport,
zoomout and pan to so the objects appear in the upper left part of the
viewport.
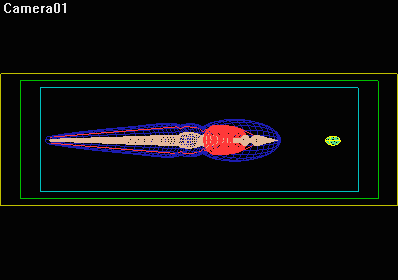
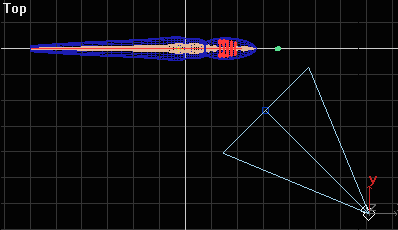
 Create a target
camera by dragging from the lower right corner of the viewport towards
the hearts: Create a target
camera by dragging from the lower right corner of the viewport towards
the hearts:
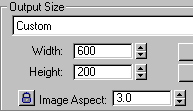
 Open the Render dialog box. In the Output Size area, set the Width to
600 and the Height to 200. Then click Close.

Press C to see the views from each camera and G to hide the grid.
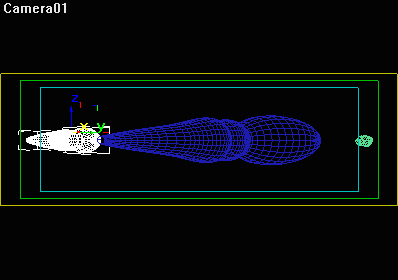
Right-click on the Camera01 viewport label and choose Show Safe Frame.
 Center the objects
in the blue safe frame by panning the viewport: Center the objects
in the blue safe frame by panning the viewport:

 In the status
bar, click the Time Configuration button.
In the
Time Configuration dialog box, enter 1500 for the animation Length.
Then click OK.

 Click
Zoom Extents All. Click
Zoom Extents All.
In the
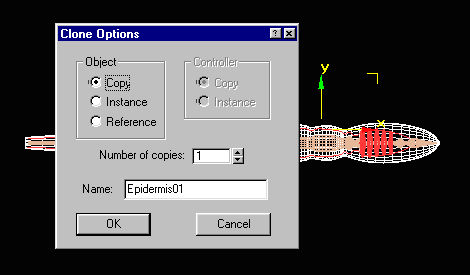
Front viewport, select the Epidermis and choose Edit > Clone. Choose
Copy and OK:

In
the same way, create a copy of the Worm's Food
Select the original Worm's Food, Epidermis, veins, hearts and guts.
Open the Display panel and hide them from view.
Only the copies should be visible now.
Select
Epidermis01.
In the Modify panel, remove the Normal modifier from the modifier stack.
Render the Epidermis to see it how it looks.

Apply
an XForm modifier to Epidermis01. The
XForm modifier, which is found by clicking the More button, has no parameters.
Instead, it is a container for all transforms that you apply while the
sub-object button is turned on. By placing the transforms in the XForm
modifier, you ensure that they will be evaluated in a certain order,
and that they can easily be removed.
 Choose the Move tool and restrict the movement to X.
Turn
on the Animate button and drag the time slider to frame 0.
 Zoom out of the Front viewport.
In the Front
view, move the Epidermis01 object to the left about one length.

Drag the
time slider to frame 300.
Move the Epidermis01 back to its original position in front of the Worm's
Food.
 Play the animation.
The Epidermis01 object moves from left to right. At frame 300, it stops
in front of the Worm's Food.
 Choose the Squash and Scale tool from the main toolbar.
Drag
the time slider to frame 50.
Squash the worm in Y so that it expands to about twice its normal length.

Advance
the time slider to frame 100.
Squash the worm in the opposite manner, so that it shrinks in X but
gets thicker in Y.
Repeat
this process at frames 150, 200, 250 and 300.
The worm stretches out and squashes back into itself three times and
comes to rest in front of the food.

Unhide
the original Epidermis.
Squash Epidermis01 until it matches the shape of the original Epidermis.

Turn
off the Animate button and play
back the animation.
The Epidermis01 object moves and stretches until it reaches the food.
Watch the animation in the Camera01 view.
 If you want to get a more dramatic effect, orbit the camera until the
Epidermis01 object is visible at frame 0:

Optional:
Displacement Mapping
If
you apply a displacement map and a Displacement Approximation modifier
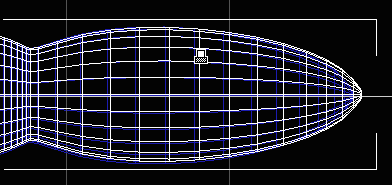
to the Epidermis01 object, the profile will look even more segmented.
But because this procedure adds polygons at render time, it also causes
the rendering to slow down. So consider these next steps strictly optional:
- Apply
a Displace Approximation modifier to Epidermis01 and set the Subdivision
Method to Regular.
- In the
Material Editor, drag a copy of the Epidermis material to a new sample
slot.
- Name
the material Epidermis01 and apply it to the Epidermis01 object.
- In
the maps rollout of each of the 3 submaterials, drag an instance of
the gradient map from the Diffuse map channel to the Displacement
map channel. Set
the Displacement Amount to 20.
- Render
to see the result:

When
you are done, hide everything in the scene.
Save your work as Earthworm05.max.
Next:
Animating the Hearts and Guts
|

